
 Mode night portrait can be named as a double exposure. In the night portrait mode, there is a photo wherein the property in the foreground uncovered with a light of a flash with the very fast shutter speed, equivalent to a pulse length of a flash. In the shooting background, there is a long exposure being used when doing the photo shoot.  1. The primary rule is a require equipment. You have probably guessed that the standard "soap box" adorable night portraits with the flash is simply impossible to make. If you do not have the SLR camera, just rent it. Additionally, you should have the fast lens with the aperture of not lesser than 1.8. For the quality of a picture, a flash will not really work. Therefore, it’s necessary to buy the outside flash. When you want a light from an external flash gets soft, then, apply the diffuser on a flash. You still have the monopod or the tripod. 2. The next rule is the aperture priority. To photo shoot a night portrait, work with the "Aperture Priority". You will make a background blur, and then shutters even bother. A camera will automatically choose the proper value. 3. Rule number three is to use the external flash. The outside flash is ideal for the night photo shoot. Shoot the property from a distance from 2-5 meters. Note your power flash. The best example of this will be “Is the powerful flash the short distance brightening a property’s facade? If you wanted a light diffused and turned soft, use diffuser. When you have not, you should direct a flash into a wall. 4. The final rule is to use an adorable space for your photo shoot. It can be your bedroom, kitchen or your front space with brightly lit lanterns. Thus, behind the property will make for the best background. It is suggested to set the night photography setting. Try to photo shoot night different lens and you will absolutely feel its difference. And usually, it is advised to use experiments. During the experiments, you’ll understand how and where did you seized that colorful, high quality, and beautiful real estate photography. You will understand how it’s vital it is to make the best photo shoot and also having the best photo post production. When you are in need of help in the photo retouch, you can also work with the photo color correction services or with any other retouching services. When you had that fear about the prices being high, it can be assured that these will not be that expensive, the retouching prices will rely on retouching techniques and levels, and with every your photo editing prices that you can locate on the supplier’s site. 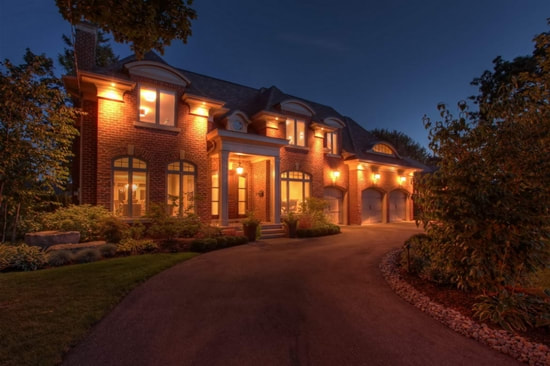 Real estate photography to remember within the city during the night without a Tripod:
1 Comment
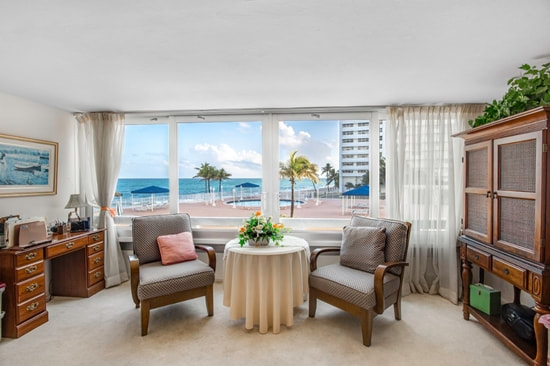 1. Open windows/blinds - finding out how to photo shoot real estate pictures correctly, you should bear in mind that the natural light will always be the best option and there are no forms of artificial light sources that will replace the sun. In this way, it is only you who can take that very adorable, saturated shadow. Enhance the result of the natural light with the reflectors and also with the LED panel. They will support you to highlight very important details, like the woods, metal and textile and elements of the furniture. Besides, the natural light can be able to make the pictures realistic as it can, and the clients can see how the actual house really looks. 2. Turn on every light - this is considered as one of the elemental, but at similar time very useful guidelines for the real estate photography. Switching the lights off and on, you can attain different effects. It will all rely on your goals. One example is, the added lights will give some coziness and warmth feeling in the images. Even so, you should take into consideration that such pictures will require light, temperature corrections during further picture editing. Operating with the brightness off will take you with a balanced temperature; however, such pictures will appear quite cold. 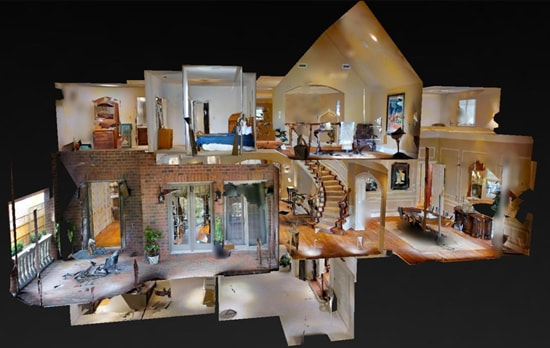 3. Set the costs right - based on the Labor report from the US, the real estate photography vocation is a well-paid job on the market. If you wish to take more, you must give educational materials and lectures like to print books and online lectures about real estate photography. Learn how to shoot the real estate videos and make the 3D tour. 4. Use the tripod with just low light - in order to have the best real estate photos in the evening or in decreased lighting conditions, you have to use the tripod. It can help you to achieve good image sharpness and simplify your shooting process. 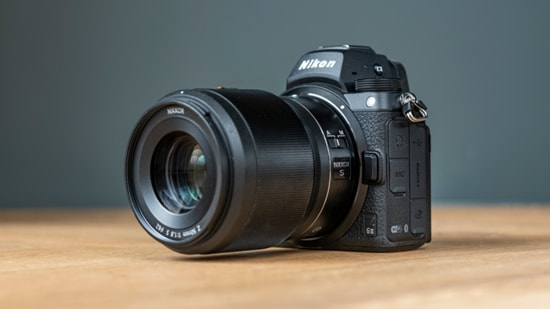 5. Choose the full-frame camera - selecting your best camera for your real estate photography will be your key to success. Pay attention to full frame cameras because they are the best for this kind of shooting. The truth is that the cropped sensor camera cannot get lots of light and the full-frame cameras will cope with this job perfectly. But, when you don’t have the chance to purchase such a device, select any camera that had interchangeable lenses. In this way you will be able to create any and even the easiest and simplest camera body even more professional. 6. Buy a wide-angle lens - in taking pro-level of the real estate pictures, you have to use good lens that is not fixed. Usually, they play a bigger role than the camera itself.
The major job of the photographer is just moving around the property quickly and then covered a maximum space. Select the wide-angle lenses and they will assist you visually to enlarge the room, then, make more inviting and comforting look. If you are planning on buying the tablet to work in Photoshop, and so you had to bear in mind some of the few things that can help you choose with the best tablets to use in the photographic editing easily and also something that will fit your budget. 1. Galaxy Tab S4 of Samsung It is always pleasant if you don’t need to pay added for the finest stylus for the photo editing, and also Galaxy Tab S4 of Samsung comes with the quality stylus. It is especially real as the device is the main costly Android tablet at present, the same with iPad Pro. Formerly, Samsung Galaxy tablets, it is also one that make sure of a smooth and nice photo editing process. It is also the best set of graphics application and plans available for Android, even though iOS still had the slight benefit. Pros:
2. iPad Pro 12.9 of Apple It is the current model in the sequence of the high-performance Apple tablet. The Pro 12.9 iPad of Apple cannot be named as the best tablet to use for the photographers who used Lightroom or Photoshop for the photo editing, but the tablet tenders important performance improvements when compared to their predecessors, and also with the smaller frame. The luxury Retina of LCD screen with the True Tone technology offered the game console-level graphic and makes it the excellent surface on where to illustrate the project. This latest Apple Pencil 2 is now giving the magnetic connection and the latest features that improved workflow, like the double-tapping to change the modes. It's not suitable for everybody as it doesn’t offer the possibility to download full-fledged software such as Photoshop CC. For that reason, this is an option only for photo chances or working with the other programs. Pros:
3. Pro 608 G1 of HP The Pro 608 G1 of HP is an expert Windows 10 tablet that has the stunning QXGA screen. Although it had a 7.86-inches screen, it can be one of those lightest tablets which will run Photoshop that you may presently buy for the slow real estate photo editing.
A high-quality screen will be of important value when editing the real estate photos and the tablet just cannot help but impress with the 2048 x 1536 pixel resolution. The color depth which is 24-bit for every pixel gives vivid visual effect and will result in high-definition pictures for photo editing. The added stylus offered 1,024 sensitivity intensities for greater accuracy in the Lightroom or Photoshop. But, equipped only with the Intel Atom processor having the clock speed of around 1.44 GHz, it’s not as dominant as the other Windows tablets. The Processing RAW files will surely take some time. Pros:
Generally, there are so many different picture techniques. But we can say one of those likely variants.
Yes, you can take images of your real state with the starry sky with the use of a half-expert camera, if it allows you do such things like set a shutter speed in about 30 second or connect a console, screw a tripod, set the higher ISO with no brutal noise open wide aperture. If not you will be severely incomplete in capacity, and it is doubtful that you take the best shot. 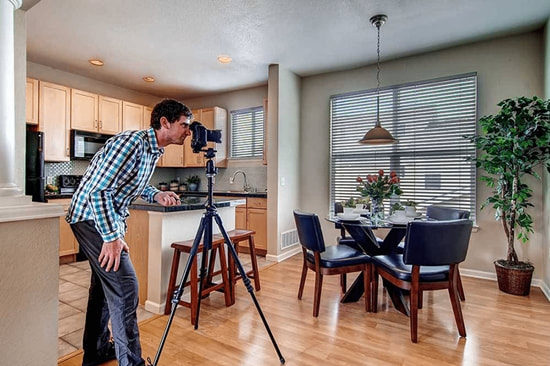 The Typical Mistakes There are some beginner photographers that began attempting on shooting the property with the starry sky that are making terrible mistakes. Since they are that sure that it’s sufficient to create the long optical publicity in 30 seconds, as a rule, every DSLR is even more fitted to provide a remote in shooting with the shutter speed of until 30 seconds. For such exposure of a diaphragm will not be clamped, though it could be desirable in creating everything sharp. Light from the stars in this instance is not sufficient for them to manifest normally itself in the atmosphere. On the contrary, this should be exposed to the Max! The lens F2.8 is fine, but there are some people that bought more light-powerful lens. But not only that the diaphragm must be opened, if possible, the ISO must be placed not lesser than 800-1600. 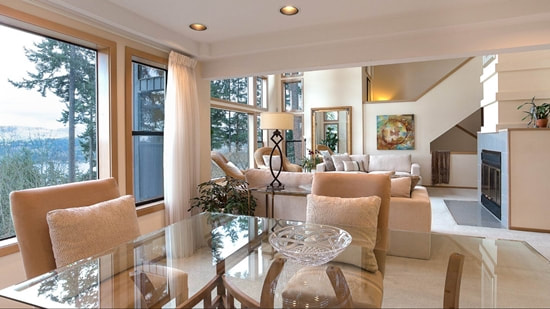 Some variants about how you may shoot your real estate property with the starry sky 1. Shot of the static stars. An exposure time of 10-40 second and this will appear such as points, like what we are seeing them with our normal eyes. 2. Shot of track but in a much different way. Create so many photos of similar plot of the skies by using the static shooting star technology with the interval in every second, and then bond together in an exclusive program in an image. Visually, it is the same to option 2; however, this has less noise and is more colorful. When shooting a track under option 3, it gets stuck together the final variant of an image, and the likelihood of creating the time-lapse video. 3. Shot the rotary motion of the sky (the stars in the shape of the strips) or otherwise, the tracks. The long exposure time starting from some more minutes to some more hours and totally unreal pictures but appears funny. 4. Time lapse. Creating even more images of static stars then became a video. Then, you may be able to make those very adorable videos like shifting the stars across the skies. There are so many mistakes that can be fixed through processing, there had been some information about how to improve the stars in Photoshop and/or the Photoshop alternatives, but initially allows understanding of the photography of the static stars.
The mirrorless camera is the part of a gear that is also considered as an important part of the entire system. This is a type of guts or a heart of the entire operation. You can go cheaper with this type, but do not go with those super affordable, as this will give you a short-life service. You may increase the real estate photography price without the need to waste your money. Here are some of the Mirrorless Cameras types for your references:  1. Canon 5D DSLR Mark III This camera uses the 61-point autofocus above the wide area with the 41 crosspoints. Even within poor lighting situations, high quality photos may be attained through the wide array of ISO-100-25 600, and with a possibility of increasing to 102 400 units. 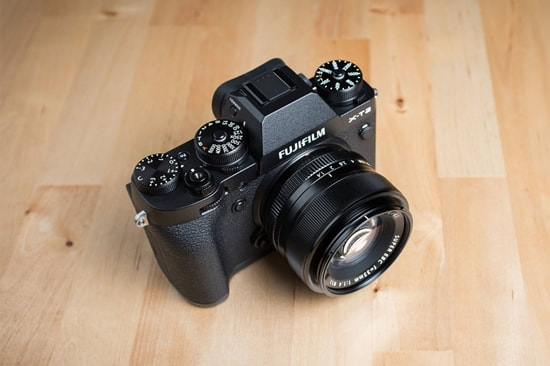 2. Fujifilm X-T2 Through this model, you may take images of an object-finder with the 0.77x zooming. A property photographer like this camera due to its accuracy in every condition, the ability to switch the settings, even if a camera is being turned off, which allows you to get ready in advance in the following photographs. To prevent from possible malfunctions, the ISO speeds and the shutter speed are equipped with the fixing button and are thicker. 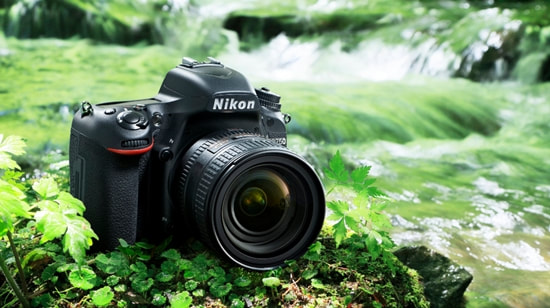 3. Nikon D750 The Nikon D750 camera type of matrix resolution is 24.3 million very effective pixels, with the new Expeed 4A images processor, and a 51-dot of Multi-CAM 3500FX automatic focus system (an ability to make 9-, 21- and also 51-point frame coverages). This Nikon D750 has been equipped with the 3.2-inches TFT LCD with the tilt angle of about -75º to 90º with the resolution of about 1.2 million pixels. Its corresponding functionality is 3. 2-inches rotary display and had been initially realized in this sorting or class of the Nikon cameras. 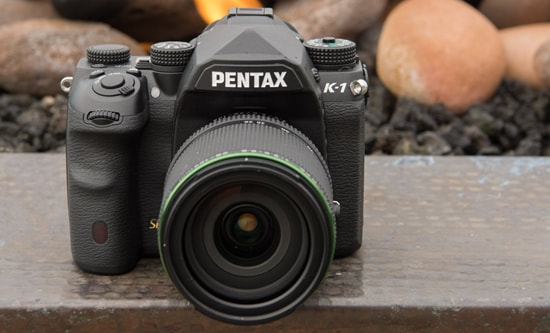 4. Pentax K-1 This device has an impressive user functionality which includes GPS, 2 memory of card slots, the 5-axis ocular image stabilization method and the rotatable 3.2-inches LCD screen with the Live View mode. Its 925-gram body had the total full-frame CMOS sensors that measure 36x24 mm and with the maximum frame size 7360x4912 pixel and the resolution are 36.4 megapixels. This one is worth to add-on to your equipment list of the real estate photography business. 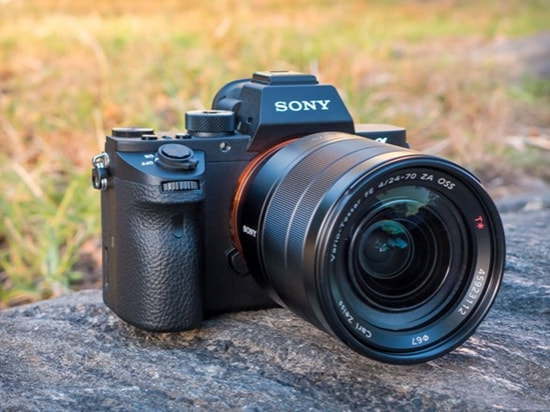 5. Sony a7S II This Sony a7S II has been considered as the best type camera for the real estate photography use. It has the low light shooting abilities, which are particularly useful in an interior shot. The following reason why this will be marketable is a log shooting format (has 3 recording formats). The Sony a7S II may record high frame rates of until 120 images in every second and the 4K video, when you decide to crate the real estate videos. 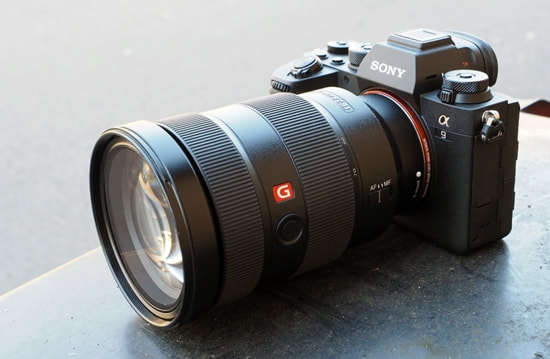 6. Sony Alpha A9
This is the breakthrough within the sphere of the ultra-fast nonstop photographing, it’s capable of taking up to 20 images in every second, and certain features have emerged and thanks to a feature of the total-frame CMOS sensor of Exmor RS. There are so many brands of monitors that you can choose for you and BenQ is just one of them and here are the three best monitors of BenQ for you.  1. BenQ SW271 – the photo editor’s choice BenQ 27” 4K SW271 PhotoVue monitor have that 100% sRGB and then 99% Adobe RGB of the color space support. When the monitor is UHD 4K, it offers that 3840 x 2160 res. The aspect ratio will be BenQ SW271 will be 16:9, and this has the refresh rate of about 60 Hz. This model is finished with the IPS technology. A contrast ratio will be 1000:1. A monitor employed the 10-bit interface and with the 14-bit LUT (3D). It includes the USB-C port that gives that accurate color reproduction and reliable color output. Sad to say, you can’t use an included USB-C portal as the dock-station for linking your laptop, but this is still one great computer monitor to use for video editing. This BenQ SW271 is being shipped pre-calibrated that has the Delta E ≤ 2 within 100% sRGB and 99% Adobe RGB color spaces, making it likely the best color monitor that is available on the market. Its system includes the software used for the calibration of the main palette elements and had been compatible with the high-quality adjusting hardware. Although BenQ SW271 had the HDR support, the limited highest brightness of the 350-nits and with its contrast ratio of around 1000:1 do not allow for that total HDR viewing encounter; that is why an HDR10 support has been mostly fitted for the photo editing. A monitor doesn’t have the Free-sync. It means you will expect some frame drops and screen tearing while running Photoshop.  2. BenQ SW2700PT – the professional monitor to use for photo editing on everyday basis The professionals preferred this monitor model due to the resolution of about 2560 by 1440 (WQHD) that is being thought as the great one in its type. Thanks to its abilities, a technologically advanced displayed BenQ SW2700PT ideally stands out among the other monitors. The sharp images demonstrate exceptional color saturation with that vivid brighter contrast. With the screen resolution of about 2560 × 1440, the SW2700PT monitor boasts with an inspiring 27-inch WQHD matted panel. The monitor gives hardware calibration, permitting its user to access the screen-processing circuits. Additionally, SW2700PT used the 14-bit LUT Look-Up Table that controlled color management and gives smooth and accurate color rendition. The users will be in need of purchasing their personal colorimeter, but through downloading the BenQ Palette of Master Element complimentary proprietary software, they will save any chosen set-up in their quality. The monitor for the photo editing is ideally styled with excellent added features, like the built-in USB3 hub with an SD card reader, plus the convenient remote control which allows you to easily and quickly change settings.  3. BenQ GW2765HT – the color settings that match the iMac Retina display This BenQ GW2765HT is considered as one of the greatest photo editing monitor, with 27-inch of an impressive resolution of about 2560x1440 WQHD. Its IPS matrix offers the best viewing angles that stayed true to its 100% sRGB shade gamut. The rack had been adjusted in height, while a monitor had 2 built-in speakers.
The BenQ monitor also had ZeroFlicker technology with the low blue light fixed to decrease the eye straining. This monitor operates at the pretty higher mill speed of about 60fps at total resolution, but may be turned off until 1080p to function at 75 frames in every second. Even though it will not be faster enough for lots of games, it tenders that smooth encounter for photo editing utilization.  Here is the following real estate photo editing for you: 1. If you do not want to perform the routine editing of your real estate images, professional retouchers will do everything as professional and as fast as they can and that includes:
 2. If you want the property photos welcoming and eye-pleasing, with amazing results guaranteed, the professional service will includes:
3. For special services, like the rooms in the house will appear neat and nice making viewers desire to step in to see the space for themselves and the service includes:
 4. For pictures of rooms that requires more detailed picture editing and at times background taking out service includes:
5. If you need some exclusive type of photo manipulation service and expecting to have that particular result which will go really well with the others of your range, you must attach the sample picture and then clearly specify what alterations the retouchers should make.
 6. When the colors in the outdoor real estate images appear distorted and unattractive, the experts know how to resolve the problem, then, returns the natural, vivid color of the image with:
7. The property photo with lots of distracting objects within the foreground is probably to attract possible buyers’ attention. That is when the editing service will come and rescue with services:
 8. If you want both the interior and the exterior image approach, you can ask for both post-processing that will give your clients with that in-depth thought about how a property looks and this will include:
9. Additionally, there are different accessories and ornamenting the place with trees and plants just in order to make a more inviting image. If this is what you need, the services that will be applied here are:
 10. If the picture was taken during daytime, but you wanted to give the viewers a view of how the house will appear in the evening, then, the retouchers will make it look eye-catching and realistic with these services:
 You have to prepare the list of the standard photo shot list for each property that you are going to take shots. Since there are no two homes that are identical, there had been typical shots that each real estate photographer may want. Being aware of what you need to cover is a very important tip in discovering how to shoot the real estate photography.
Prepare the gear at night before actual shot 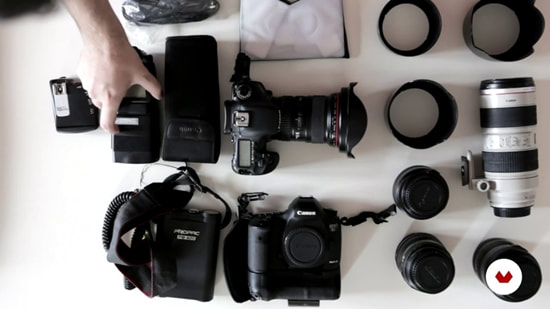
What to do when at the Property Decluttering – this has been one of the top important real estate photo tips. You have to be friend with the real estate mediator that has been in touch with those homeowners.
In our homes, we had been used to bits those clutter building up in due time. But all the small items that had not been notice will show up in the photo. Be certain that the homeowners keep the exterior in as fresh as possible—desks, countertops, coffee tables, etc., but if you want, choose those decorative items. In the shooting interiors, do not photograph the closets except they are customized or spacious. Most of the time, the closet is an ideal spot to stash smaller items until your photo shoots ended. At times, you may arrive in your home, and there had been cluttering that you are aware that they will not appear attractive in the photos. There is really nothing wrong by suggesting to hides some extra things. The arrival of the latest pandemic has had a huge effect on many countries, which is now evident. Several corporations have declined, the crime rate increasing, and shopping on the internet is becoming more popular. Because of this impact, companies and sectors are now trying to make the most of it. Not exempt from this is the real estate market. The real-estate market has long been wagering on trends in line with this. Multiple software programs have produced post-processing images of assets to make more attractive and, in effect, more effective. In conjunction with real house design and re-modeling, customers still depend on home images, which eventually enter the target market. Property photos play a critical role in enticing new buyers, and ultimately, along the way, a profit. The Variation of Virtual Tours Nowadays, after the pandemic struck, the transition from real open houses to virtual open houses is in demand. Do a walk-through before shooting to get set when in hand. It will help you determine whether you want the picture and its significance to be published. The images give the idea that the property is okay, so the person who sees it wants to buy it. And here are some virtual tour design tips, so you can: From there, set up your supplies. In addition to a lightweight and capable camera and lens, even a solid and sturdy monopod may be chosen. It would be correct to capture shots from outside or from inside. Choose a heavier monopod on the arms, with a lighter pack. This is, in truth, going to help you edit. Attach it to a mobile phone, then. Smartphones should be able to download the software you are using. Using a computer that comes with a timer set to 2 seconds and 360 degrees. For taking photographs of the interior of the home, such varieties would be of great value. 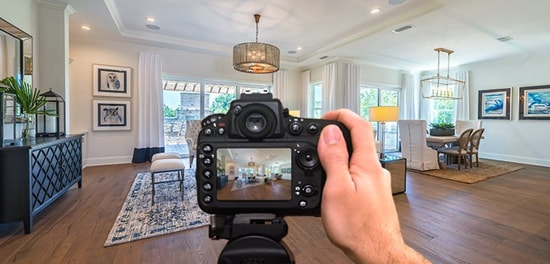 Only make sure that the real estate property is the target of the shooting. Before using a two-second timer to take the shot, make sure you encourage your hand to get away from the camera. Which makes it possible to talk about steady shots and shots, taking several shots under varying lighting conditions. Using the automatic feature when taking images. A lot of pictures, coping with further tools will have to be there. You will begin to build these sales-worthy house photos until you have significant materials. Then, when saving the captured image using JPEG, for the consistency of a lower camera sensor, or often referred to as ISO. The lower the ISO, the more the pictures get sharper. Photos will be less grainy, and you will be able to move them to the size of the file. Thus, when the editing of immovable imagery occurs, more photographs will mean more options to select from during the post-processing phase. In fact, before uploading to BoxBrownie after shots are taken, do some editing on the photos first. Changed pictures should look better and be more textured. Indoor and outdoor images can be completed for floor plan construction, video editing, and simulated updates. This will mean further marketing of the pictures only after the house is leased.
 Photography is in itself something like an art form. The key stakes are being as imaginative and professional in the real estate industry as possible. It is a fairly good idea to pair those techniques with integrity. Before any real estate property is finally sold, employing a good real estate photographer is the first step in achieving the goal. If we want to be qualified, then it's all about the set. Professional service ethics, such as preparing to include planning and set-up and always being on schedule. Exterior features of the scenery are best seen through the day-to-dusk photos, also known as twilight scenes. When editing real estate property, particularly for outdoor photos, be sure to note the following:  Brightness and Contrast Adjustment The degree of darkness and brightness in the scene varies from the viewing standard. The visibility is the quantity of light that enters the photo. Increase in the image illumination or brightness have an effect on the frame's mid-tone. It is here where the white balance changes into issues to address. To focus on details to make the picture stand out, the white balance fine-tuning must be achieved. 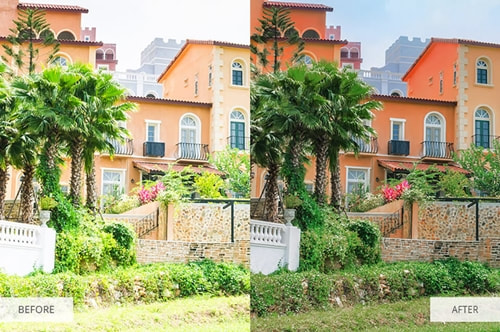 Image Color Correction If the photo is fine-tuned with the white balance, any color cast on the background is also removed. Improving the image is a means of adjusting the colors of the photograph. Furthermore, if the colors are still perfect, then there is no reason to modify them. A picture may still be affected by small imperfections, but the image can become more precise by eliminating these flaws. Adding and Removing Objects The use and exclusion of objects in the production of images are normal. Remember that the improvements in those adjustments will render us right. That is so that when they come to visit the home, clients do not get annoyed. As a consequence, for visual attraction reasons, certain unwanted elements are often missed by cropping and editing. By using the Day to Night conversion in Photoshop, you can do magic. Looking at the image of the house during the day or night, prospective customers may judge the property in terms of those decisions. Alignment of Lines Reviewing a landscape shot, keep in mind that the lines on the feet are clear and quick. Stability and strength are expressed by vertical lines. Using the Adobe Lightroom Lens Corrections section to enhance the shot. Horizontal lines are visible from left to right, as seen in the photographs. That row is the most common thread, like the vertical one. It expresses calmness, intensity and weight. There are also a lot of other advertising knowledge, and the strategies that clients need to learn as a real estate agent. Be assured that the computer will accomplish its target. Pick angles that complement the environment and soil. Editing using Bracket Exposure
An innovative way of lighting the house, especially the interiors, is the use of bracket light. That's based on this method's three pictures. Another image is produced under natural light, another image is over-exposed, and the third one is under-exposed. The method consists of combining the 3 images into one. If this is objected to, in post-phase implementation, a mixing technique can be used. |
A. RookeReal estate photographer for 10 years. Archives
August 2020
Categories |
 RSS Feed
